N64 Vertex Painting Guide
May 1, 2025 [3D]
In the N64/PS1 era, vertex colours were commonly used to fake shadows and depth on simple 3D models. This approach was essential because real-time lighting calculations were incredibly demanding on the hardware of the time.
By painting directly onto the model’s vertices, artists could create subtle variations in shading and colour— without needing large, complex textures or detailed UV maps. This technique also allowed for creative additions like mossy greens or worn edges, all baked into the vertex data.
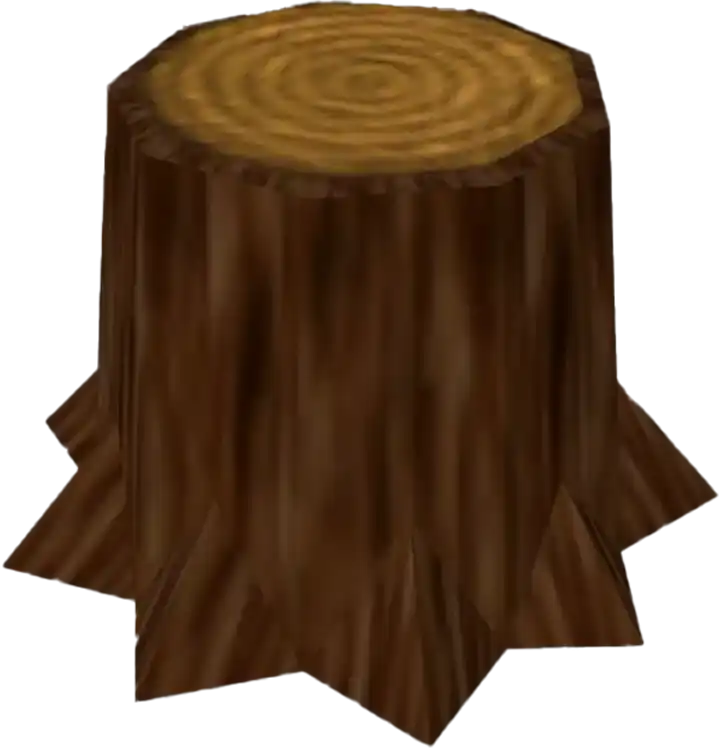
Here’s a tree stump I made for Spirit Lens which we can use to demonstrate the technique:
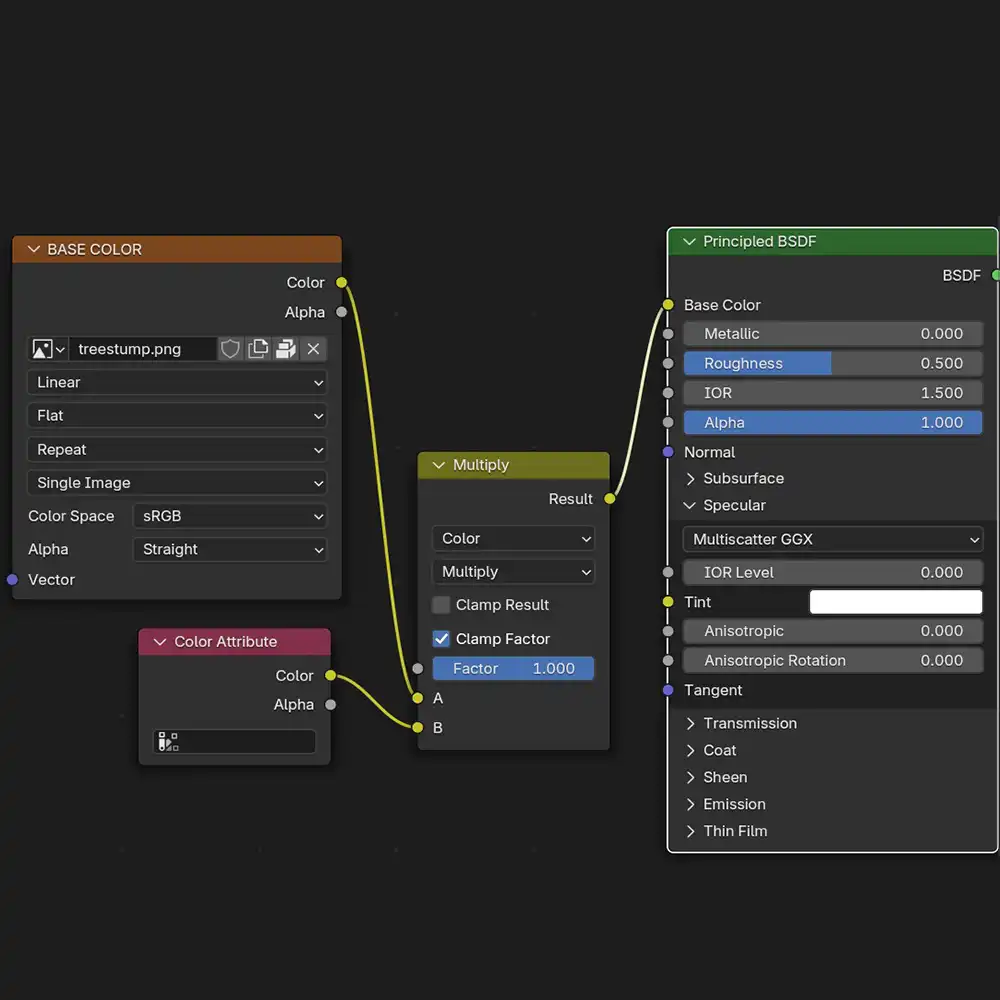
In Blender, you can set up your material nodes like this to begin vertex painting:
Switch to Vertex Paint mode to start adding colour.
I just added some subtle shadows and green to give the impression of moss.
It’s easy to view your work in
Solid shading mode:
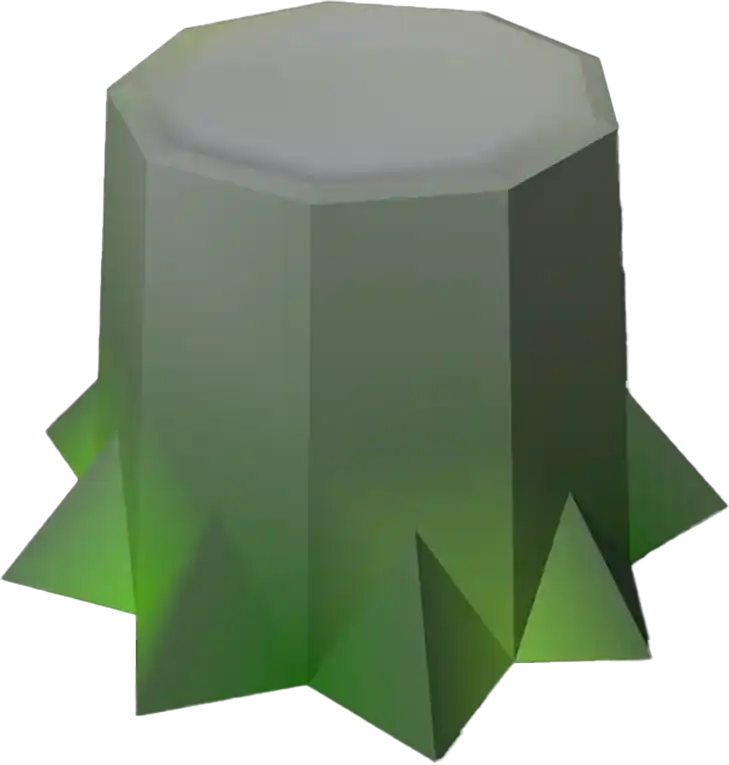
The same tree stump now with vertex shading looks something like this:

Here's a tree I made before and after vertex painting. As you can see, it makes a huge difference to the perceived fidelity: